Gotchas while installing Sitecore 9 using the Sitecore installation framework
Sitecore released a nice Installation framework to install Sitecore, xConnect and configure Solr. I used this framework already a few times (on a few machines and it turned out that I am very proficient in breaking things. Especially Sitecore 9). During this installation I faced some inconvenient issues (and found out some tips) which I wanted to share with you. This should help you getting up and running even faster!
Download the prerequisites and setup your resource directory
First, download the following files:
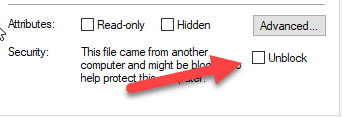
Create a directory c:\resourcefiles and extract the contents of the installation package to this folder. There should be a Sitecore scwdp.zip and an xConnect.scwdp.zip. Extract the content of “XP0 Configuration files rev.xxxxxx.zip” to the root of this directory as well. Last but not least: copy your license.xml. Make sure to unblock your xml and zip-files. Right click on each file and select “Properties”. Enable unblock and press OK.
Install the latest version of the Sitecore Installation Framework
Use the following commands to install the latest version of SIF:
When this doesn't work, there might be a chance that you manually installed an older version. Remove it. It might be found it the
Install Solr, run as a windows service and setup https
The first prerequisite is to have Solr running over https. First, install Solr as you normally would, after the installation, you should visit this blog by Kam Figy as he wrote a nice script to setup https.
The Sitecore installation framework requires Solr to run as a windows service. When heading back from the Sitecore Symposium I tried to set this up, but didn’t get it to work. The trick: make sure to run solr as a foreground process: solr.cmd -f -p 8983. This blog helped me on how to set it up. They made use of a tool called NSSM
Enabled Contained database authentication
This is generally not a best practice, but xConnect requires the ability to login using a sql login. When you copy the query from the installation guide, all the commands are placed on a single line, which causes sql to bug out. Copy the sql query from the source below and you’re good to go!
Download the configuration files
Don’t. As the Sitecore Installation framework uses a set of configuration files to deploy an environment, Sitecore provided a set of configuration files. The Installation guide tells us to download them from https://dev.sitecore.net, but I spend like 20 minutes searching for them: they weren’t there. Turns out that they are part of the installation package.
Install Sitecore and xConnect (and repeat when this fails)
The next step would be to install Sitecore. Sitecore provides a nice installation script, but again: it gives some problems while copy-and-pasting it. This gist provides the same script, but is more easier to copy. Save it as c:\resourcefiles\install.ps1 When the Solr-task gets executed and gives a strange error, this might be due to the fact that the windows service hasn’t been started yet.
It might be possible that the installation doesn’t end successfully (due to some configuration errors). Just re-starting the installation will not work, as the framework tries to reinstall the databases. As manually deleting them isn’t fun, I always stop the two web applications (xp0.sc and xp0.xconnect) and run the sql script below:
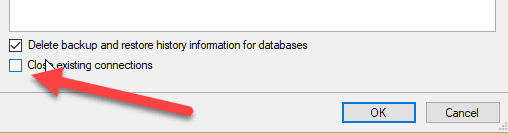
it might be possible that the Marketing automation table cannot be deleted. I always delete this one manually, just make sure to tick the box “close existing connections”
Note to self: do not forget to run the post-installation steps
For some reason I always forget those. As xConnect will NOT work without those post-installation steps the script below really should be executed. As it came from the guide: when copy-pasting it from the guide, the query will bug out. Fire up your Sql management studio, create a new query and set the mode to SQLCMD.
Conclusion
Having an automated installation is great and I will definitely use this over SIM, as this guide takes care of a secure installation, setups solr and xConnect. However, there are some inconvenient issues which I just wrote down, I really hope it helps you to get up and running as soon as possible!